We are authoring a series of articles to share about an end-to-end process from data preparation, to model training, to model deployment, to pipeline building using SageMaker Pipeline, and also pipeline monitoring on Amazon SageMaker. This first article of the Amazon SageMaker series focuses on how to Train Detectron2 for Object Detection in Amazon SageMaker.
Artificial Intelligence is one of the burning topics in today’s world along with a lot of discussion about deep learning, which is the subset of machine learning. Deep learning is an artificial intelligence algorithm that mirrors the activities of the human brain in preparing information and utilizing features for use in decision making. Common applications of deep learning are computer vision, natural language processing, self-driving cars, fraud detection and so on.
Object detection is a computer vision task that locates and classifies objects in images and videos. In simple terms, it determines the type and location of images in the provided media. Object detection tools can identify a target object, surround it with a bounding box, and assign it a class label. This capability offers significant value to a broad range of industries, integrating into the technology used for self-driving vehicles, video surveillance, medical imaging, and more.
However, until recently, object detection models have been challenging and expensive to develop. Models also didn’t perform especially well, allowing for few practical applications. Fortunately, the 2010s saw rapid development in deep learning and neural networks. Open source projects are now more widely available, making tasks like object detection more accessible.
One such solution is Detectron2 which is a state-of-the-art computer vision model library from Facebook AI Research (FAIR) based on PyTorch. Detectron2 is a highly flexible open source tool which offers both pre-trained and highly customizable options for object detection. Pre-trained options allow you to use state of the art object detection while cutting down on training time, and time spent on finding suitable training datasets. It also gives the flexibility to train with custom labeled images to fine tune the model to your specific use case.
You can find more technical implementation details about Detectron2 on this official documentation website. A variety of baseline model options and metrics benchmark comparisons can be found here, including object detection, instance segmentation, and Panoptic Segmentation.
When considering what platform to use when developing and running Detectron2, Amazon SageMaker is an excellent choice. SageMaker allows you to experiment, quickly iterate upon, and deploy models while seamlessly integrating with the rest of your AWS environment. With a range of customizable solutions and deployment options, the Amazon SageMaker platform enables developers and machine learning engineers to build and ship fast, reliable machine-learning models.
The tutorial in this article will walk through how to use Detectron2 on Amazon SageMaker. It will demonstrate how to create a SageMaker Studio notebook, set up Detectron2 on SageMaker, and use a pre-trained model to detect objects. Later, subsequent series articles will walk through below topics:
- How to deploy a Pytorch model using customized inference script on Amazon SageMaker
- How to streamline image labeling process using AWS Ground Truth with model training on Amazon SageMaker
- How to build MLops workflow using SageMaker Pipeline - a Pytorch CV model
- How to integrate image data monitoring in a Mlops workflow using SageMaker Pipeline
Tutorial Prerequisites
This tutorial requires an AWS account and the following tools:
- AWS SageMaker
- SageMaker notebooks
- Detectron2
- PyTorch
It’s also helpful to have some familiarity with SageMaker Studio and notebooks. This blog provides AWS SageMaker best practices references.
Creating a SageMaker Studio Notebook
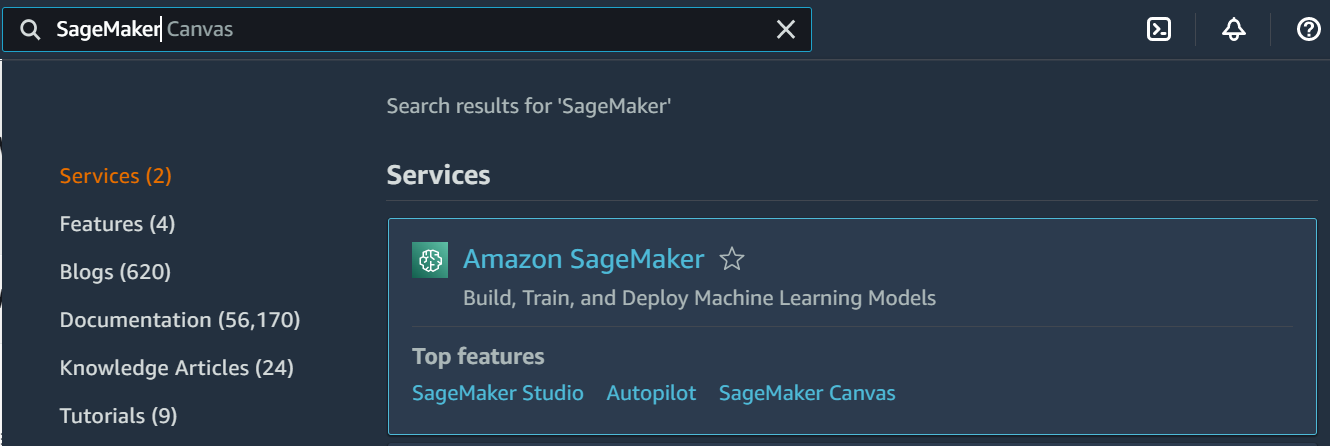
First, log in to your AWS account from the AWS management console. Search for and select SageMaker in the Services tab:
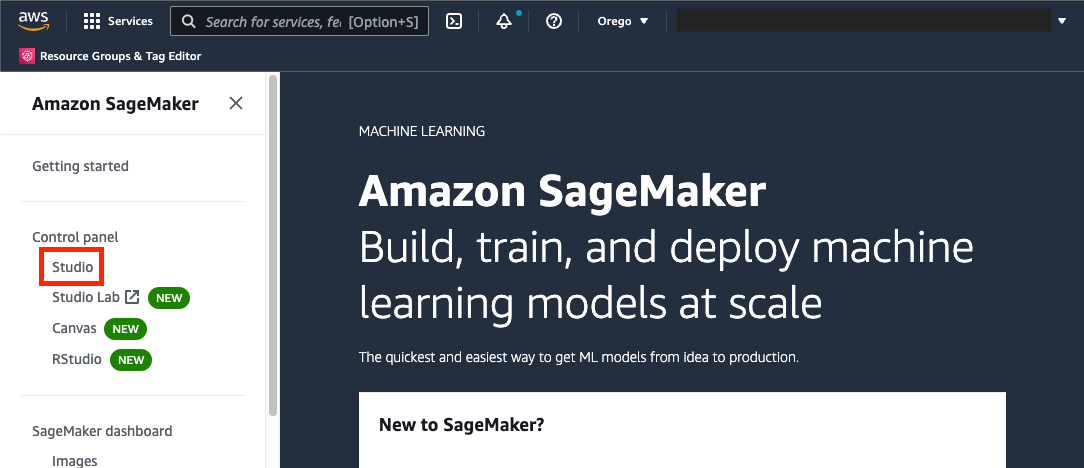
Then, on the left tab, under SageMaker Domain, click Studio:
The first time you use SageMaker Studio, you’ll need to perform a bit of setup:

Use the Quick Setup option unless you know that you’ll need more advanced configuration options. This will set the configuration for the domain.
Next, set up the configuration for the first user. Enter “name” which will be the username of the first user in the domain.
Then select an IAM role. This role will be used as the default execution role for notebooks and resources in this user’s SageMaker Studio environment. If you have an existing IAM role for SageMaker you wish to use, select it here. Otherwise create a new IAM role using the console. This will grant full SageMaker access as well as access to S3 resources specified. Click Create Role. For more information on IAM roles please refer to the AWS documentation.
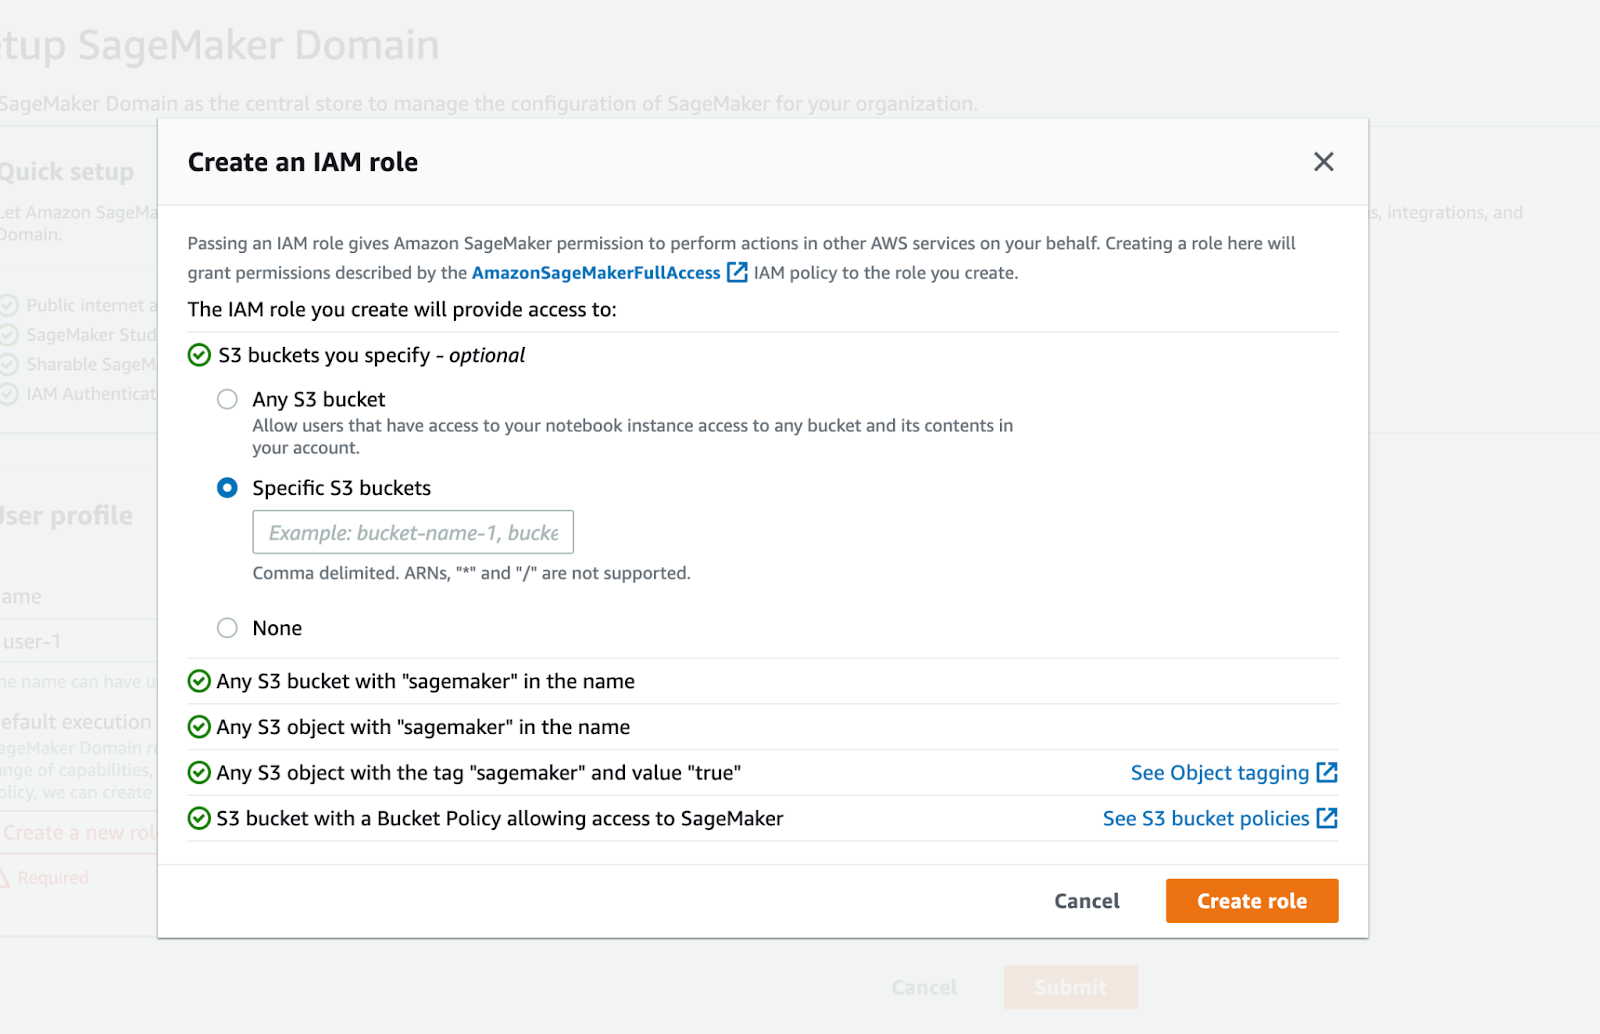
The message below should appear. To continue, click Submit.
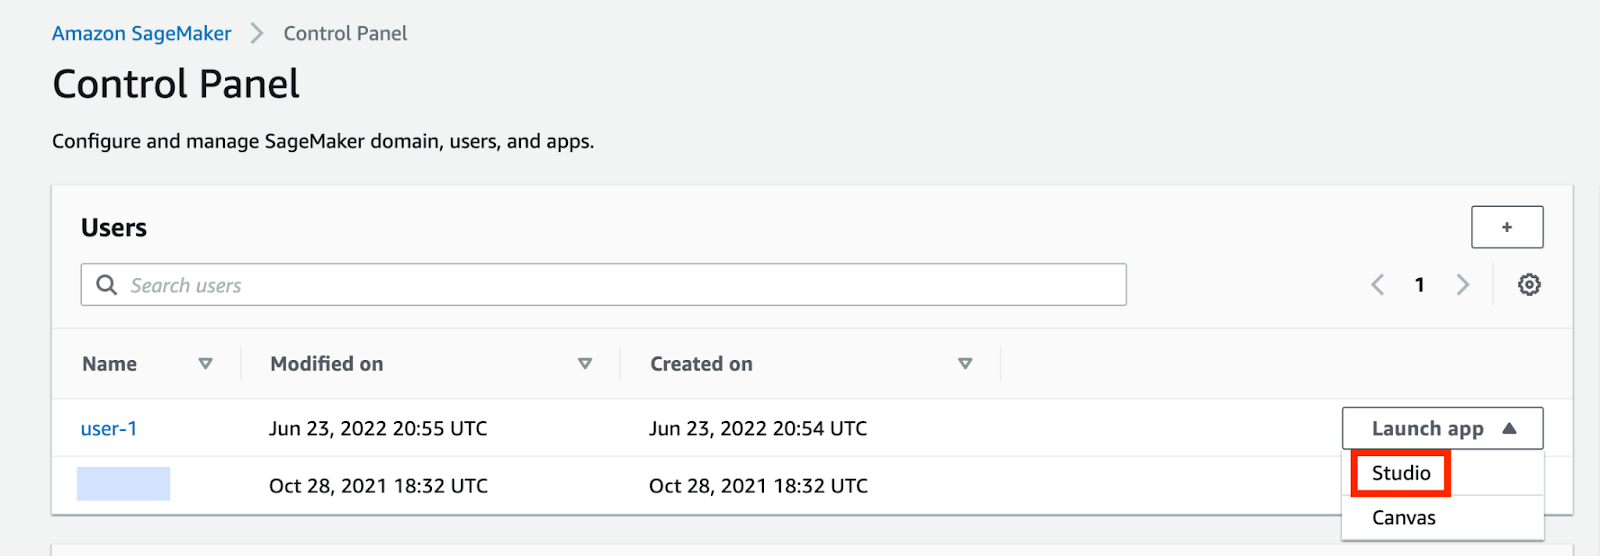
SageMaker will take a few minutes to create the domain. Once this process completes, you’ll see your newly created user listed in the Users section.
To launch a SageMaker Studio, click Launch app and select Studio:
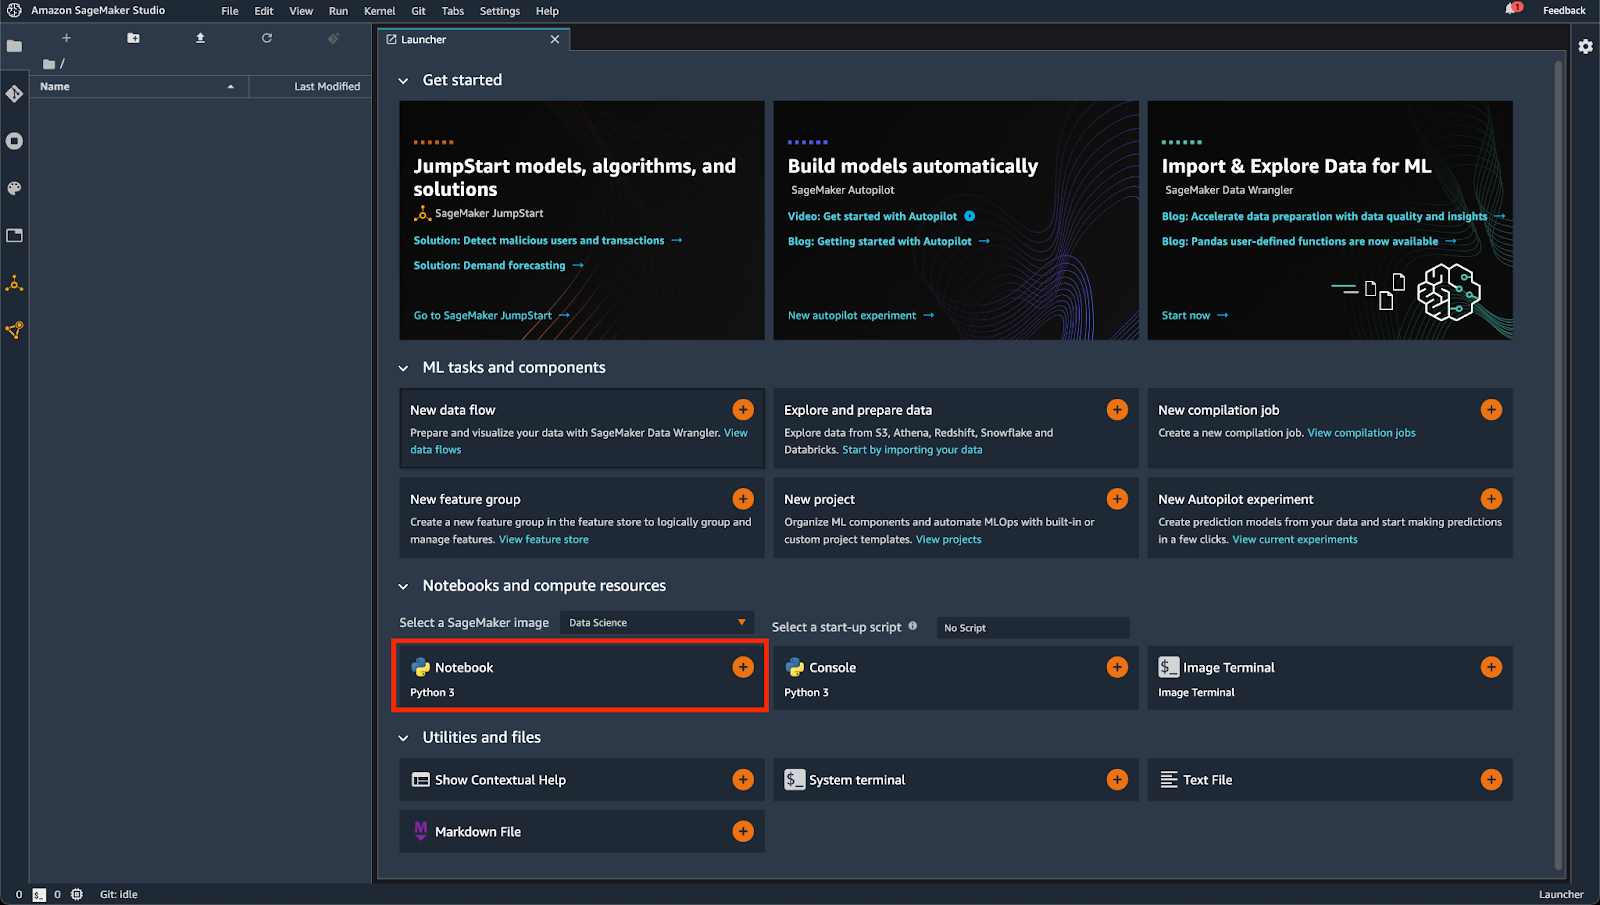
This will launch the SageMaker Studio application, and bring you to a launch page. In the notebooks and compute resources section, select Notebook: Python3. This will launch a new Jupyter notebook.
Setting up Detectron2 on AWS SageMaker
Now that you’ve created a SageMaker Studio notebook, the next step is to install required packages and dependencies. There are several ways to install dependencies in SageMaker studio, but we will be using a method which installs the dependencies when the notebook is run. The commands below can be put directly into a cell in the notebook and run from there.
Since SageMaker Studio notebooks are running in a linux environment, we can use apt-get to install some of our dependencies. First, update apt-get and check the version. Then use it to install some of the dependencies for PyTorch and OpenCV.
!apt-get update
!apt-get --version
!apt-get install ffmpeg libsm6 libxext6 gcc -y
Next we will use pip to install PyTorch and torchvision, here we specify the specific version that is used by Detectron2, and where to download it from.
!python -m pip install torch==1.10.0+cpu torchvision==0.11.1+cpu -f https://download.pytorch.org/whl/cpu/torch_stable.html
Install OpenCV, an open-source software library that enables machine learning engineers and developers to build computer vision and machine learning applications.
!python -m pip install opencv-python
Then, install our specified version of Detectron2 and some of the necessary dependencies:
!python -m pip install pytest-filter-subpackage>=0.1
!python -m pip install pytest-cov>=2.0
!python -m pip install pyyaml>=5.1
!python -m pip install detectron2 -f https://dl.fbaipublicfiles.com/detectron2/wheels/cpu/torch1.10/index.html
Note that we are using a CPU-only version of PyTorch and Detectron2 for this article, since we are running on a CPU instance for experimentation. GPU-versions are also available which may provide faster performance when using at scale.
Running a Pre-Trained Model
Now that you’ve installed Detectron2 and its dependencies, it’s time to use it. Detectron2 comes with a Model Zoo containing many pre-trained models. The demonstration below uses one of those pre-trained models built for COCO Object Detection using a recurrent convolutional neural network. This model detects objects by giving us a bounding box for any detected object and a classification according to this list of those class names.
First, you need an image to test Detectron2, you can pull a freely licensed image from the Internet:
import cv2
from matplotlib import pyplot as plt
!wget "https://unsplash.com/photos/IrQmtib-ER4/download?force=true&w=640"-q -O input.jpg
im = cv2.imread("input.jpg")
plt.imshow(cv2.cvtColor(im, cv2.COLOR_BGR2RGB))
plt.show()
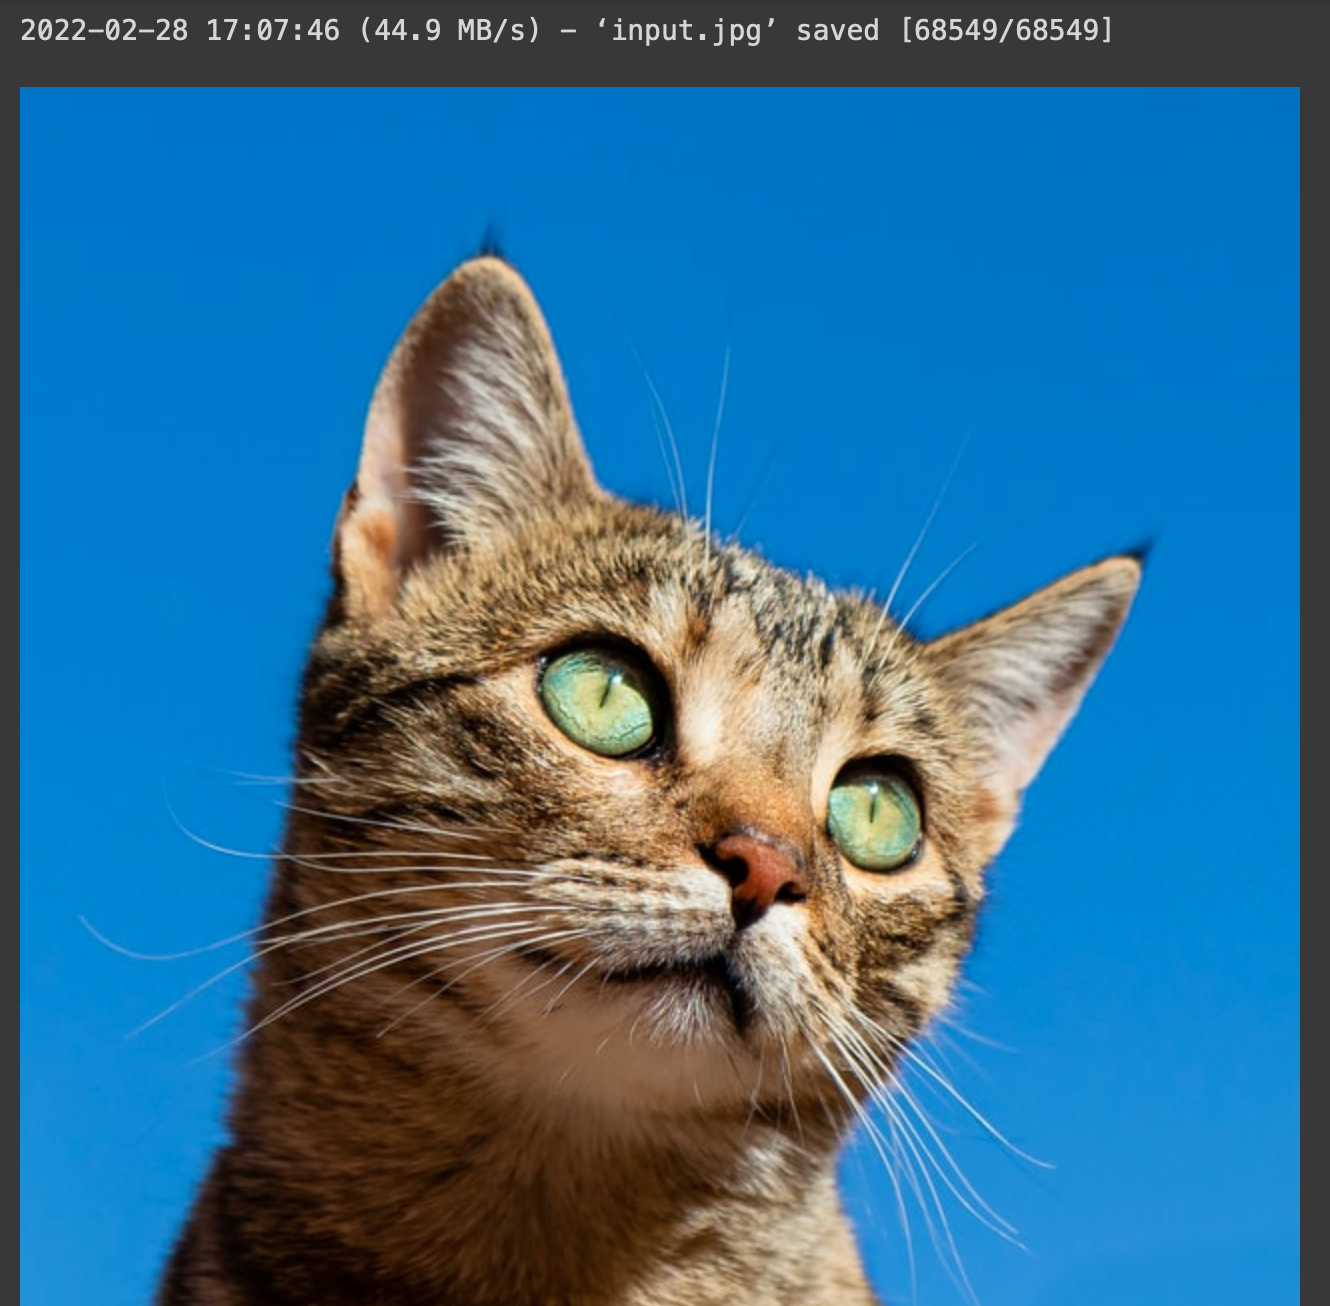
Running this code should download and display an image of a cat.
Next, we will set up the configuration for Detectron2. Here we are taking a configuration form the model zoo.
from detectron2.config import get_cfg
from detectron2 import model_zoo
cfg = get_cfg()
cfg.merge_from_file(model_zoo.get_config_file("COCO-Detection/fast_rcnn_R_50_FPN_1x.yaml"))
# set threshold to filter out low-scoring bounding boxes
cfg.MODEL.ROI_HEADS.SCORE_THRESH_TEST = 0.5
# load model weights from the model zoo
cfg.MODEL.WEIGHTS = model_zoo.get_checkpoint_url("COCO-Detection/fast_rcnn_R_50_FPN_1x.yaml")
cfg.MODEL.DEVICE = 'cpu'
The next step is to create a predictor and get a prediction on our image. We will be using DefaultPredictor for this notebook, which is used to predict on single images.
from detectron2.engine import DefaultPredictor
predictor = DefaultPredictor(cfg)
outputs = predictor(im)
print(outputs["instances"].pred_classes)
print(outputs["instances"].pred_boxes)
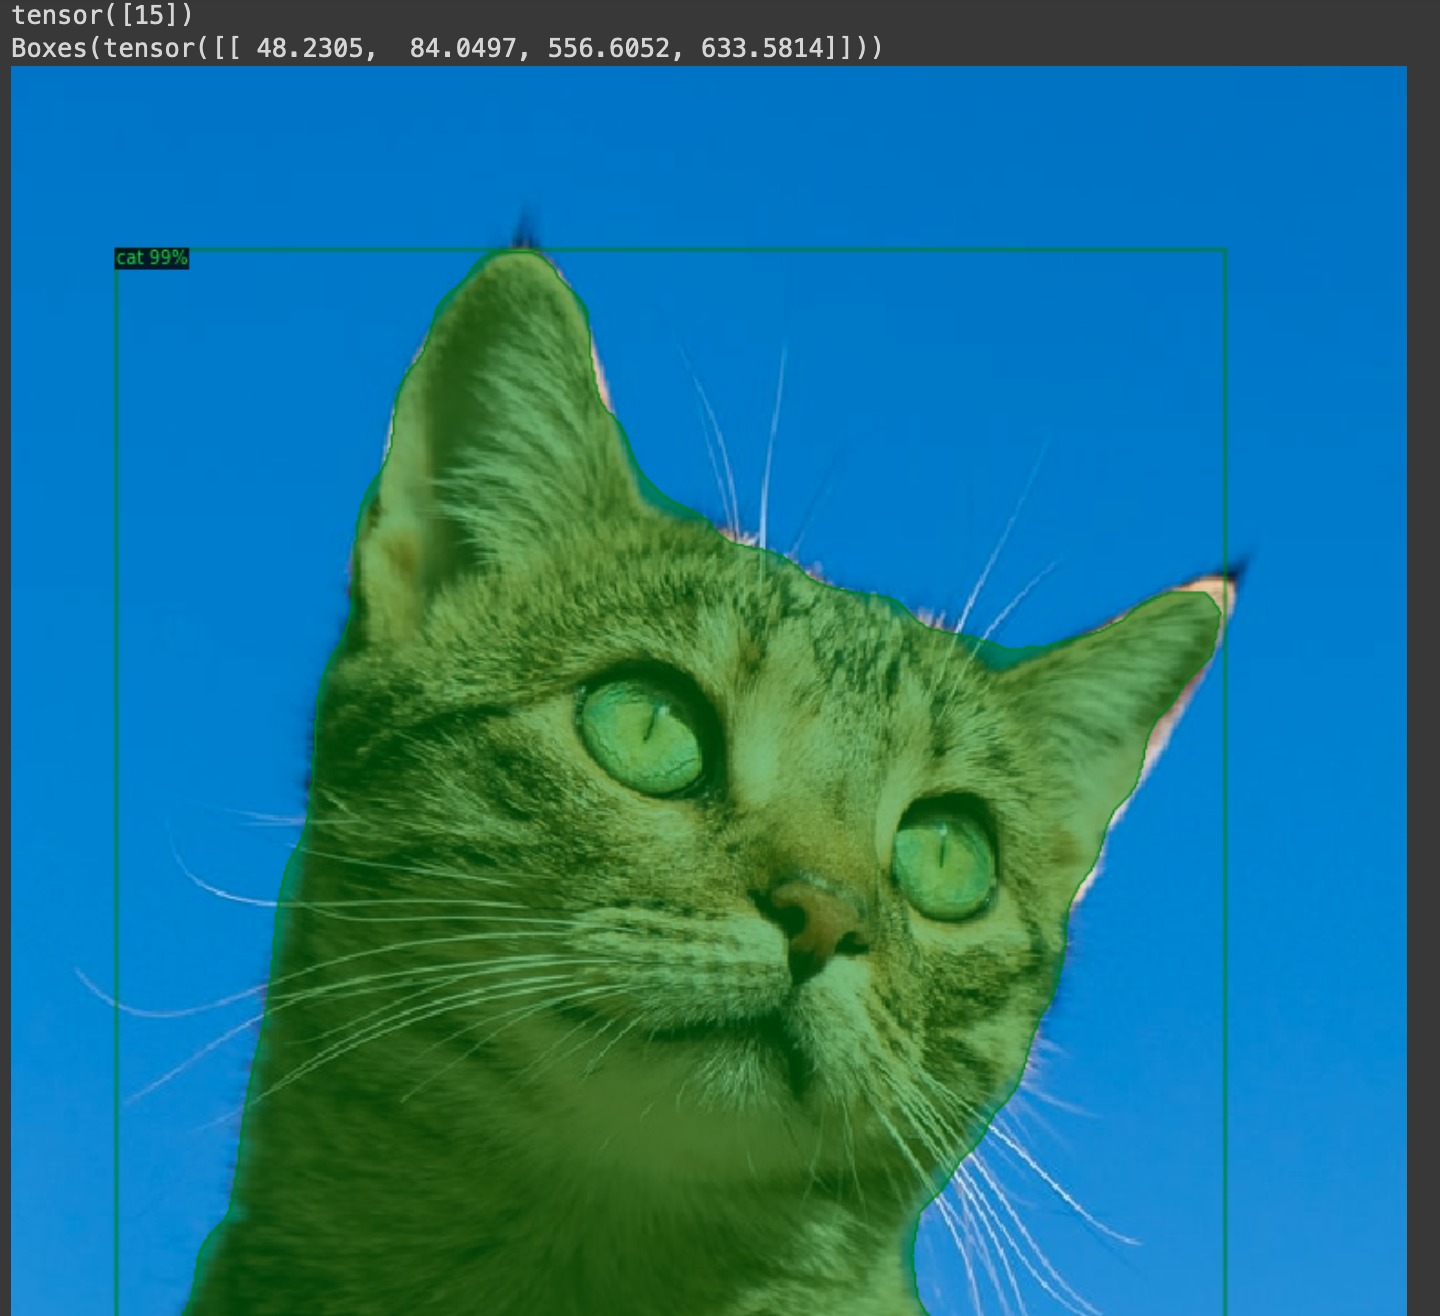
These outputs represent the bounding boxes of any objects the model detected in your image. You’ll get the following output from your cat test image:

The first line tells you Detectron2 found one object with a class ID of 15. Since COCO class names trained this model, you can check against a list of those class names and confirm that class 15 is, indeed, a cat.
The next line shows the bounding box of the cat inside the image.
Though it’s nice to know the coordinates of the cat’s bounding box, it would be better to see a visual highlight of where Detectron2 found the cat in your test image. Fortunately, the Detectron2 Visualizer enables you to do this.
Draw Detectron2’s class prediction on your image and display it.
from detectron2.utils.visualizer import Visualizer
from detectron2.data import MetadataCatalog
v = Visualizer(im[:, :, ::-1], MetadataCatalog.get(cfg.DATASETS.TRAIN[0]), scale=1.2)
out = v.draw_instance_predictions(outputs["instances"].to("cpu"))
plt.imshow(out.get_image()[:, :, ::-1])
plt.show()
When you run this code, Detectron2 will highlight the cat and draws its bounding box:
You have now established and tested a basic object detection function. In just a few lines of code, we were able to get an accurate prediction and bounding box without ever having to create a dataset, label images, or train a model by implementing a pre-trained model from Detectron2. With some fine tuning, we can further improve upon this model and customize it to a specific use case. For now, though, the pre-trained model demonstrates the ease of getting started with learning how to implement object detection using Detectron2 on Amazon SageMaker.
Conclusion
Thanks to Detectron2 and pre-trained models, it’s easy for developers and machine-learning engineers to incorporate powerful object detection capabilities into their applications.
However, many organizations need to write and fine-tune models to ensure accuracy and service their customer needs. Deploying models in production can present an additional challenge. The next article coming up soon in this series will demonstrate how to fine-tune Detectron2 and deploy it to a SageMaker endpoint. Then the later subsequent series articles will walk through the process of how to prepare your own customized training data to further tune the Detectron2 model by using AWS Ground Truth, how to implement image data augmentation, how to utilize Amazon SageMaker Inference Recommender and Serveless Inference to help inference endpoint selection and management, and also how to build a MLops workflow.
For now, you might prefer to focus on your core competencies and work with a partner who specializes in AWS and machine learning. If that sounds like an accurate description of your goals, Mission might be an exceptional solution for your managed cloud service needs.
Mission can handle the complex aspects of building out your machine-learning architecture on AWS. This ensures that you can focus your energy and attention on your customers’ needs. If you’re curious, click here to read more about how Mission helps organizations fulfill their AWS-based data, analytics, and machine-learning goals.
FAQ
- How does the performance of Detectron2 on SageMaker compare to running it on local machines or other cloud platforms in terms of speed and cost?
- Running Detectron2 on Amazon SageMaker offers scalability and flexibility, potentially leading to faster training times and lower costs compared to local machines, depending on the specific configuration and resource allocation. The managed services and optimized infrastructure of SageMaker can reduce the overhead of setting up and maintaining the environment, allowing for more focus on model development and experimentation.
- Are there specific types of object detection tasks or industries where Detectron2, trained and deployed via SageMaker, is particularly effective or not recommended?
Detectron2, when utilized within Amazon SageMaker, is versatile and can be effectively applied across a wide range of object detection tasks. Industries such as retail, automotive, and healthcare may find it particularly beneficial for applications like inventory management, autonomous driving, and medical image analysis. However, the suitability of Detectron2 should be assessed based on the specific requirements and data characteristics of each project.
- How does the use of AWS Ground Truth in the context of training Detectron2 models on SageMaker enhance the accuracy of object detection, especially for custom datasets?
- AWS Ground Truth is crucial in enhancing the accuracy of Detectron2 models trained on SageMaker by providing high-quality labeled data. This service simplifies the process of creating, managing, and annotating datasets, ensuring that the models are trained on accurate and relevant information, which is essential for achieving high performance in object detection tasks.